Poultices
Simply gather an herb or natural substance, mix it with water and make a paste to put on the affected area. You will hold this paste in place with a cloth. There are multiple benefits from this type of poultice.
Most of us already have the ingredients for a basic poultice, yet may not know how to make one, or what some of the benefits are.
A poultice can reduce infection, subdue inflammation, relieve itching, extract poison or toxins, and heal a wound or burn.
In general, follow these basic steps. Remember: assess the condition and if you need to seek medical attention for something serious, do not hesitate to do so.
- Gather a quarter cup of herbs or a natural substance to make a paste (i.e.: baking soda). If you are dealing with a smaller area you can cut this recipe in half.
- Mix ½ – ⅓ cup of hot water with the herbs or powder.
- Place the mixture on a cotton cloth about half the size of a normal washcloth.
- Lightly pat the mixture down.
- Turn the cloth over and place it on the affected area.
- Secure it with a tie or rubber band.
- Let the mixture soak into the skin for twenty minutes.
- Remove the cloth.
- Pat the area dry, gently.
- Reapply as needed depending on the condition
Heal Burns With An Aloe Poultice
A friend who came from the Southwestern region of the US remembered her grandmother using aloe poultices. You can grow this plant very easily in a sunny window in your own home.
An aloe leaf is an excellent way to heal a minor burn. Simply cut a large leaf from the plant and split the leaf down the edge. Open it up and place the gel side face down on the affected area.
Aloe offers cool relief to sunburned or blistered skin. Aloe soothes, Is anti-inflammatory, dries quickly, and makes its own ‘band aid’ when the gel dries and forms a protective layer.
The gel repairs damaged cells. Its astringent quality tightens and tones the skin. Reapply as often as needed until the burn goes away
Heal Chest Congestion And Coughs With Onion
One friend’s grandmother came from the Midwestern region of the US. She used onion poultices routinely on her large family as a cough remedy; when one person started coughing, soon, the family came down with the same ailment.
An onion poultice is easy to make, effective and very inexpensive. It is a wonderful traditional home remedy for bronchial infection.
Onion juice is an expectorant. When absorbed into the chest and the bronchioles, it loosens mucus and subdues inflammation.
Use a warm onion poultice if someone has a hard time breathing, has an upper respiratory infection, a sinus/upper respiratory infection, or a serious cough with mucus.
Onion poultices work for lingering coughs that do not seem to fade away. Actually, onions contain vitamins and minerals like quercetin, which helps enhance immunity.
Onions are high in Sulphur and are antibacterial. If you have very sensitive skin on your chest this remedy may not work for you because it may irritate your skin. Use your best judgement.
The method is quite easy:
- Slice two 1/4 inch slices from a medium sized onion.
- In a pan with a little bit of water warm the onions up for just a couple of minutes.
- Put them in a washcloth, a tea towel folded in half lengthwise, or square of clean cotton fabric.
- Make sure the onions are just warm, not hot.
- Place the slices side by side on the upper part of the chest.
- Leave the slices there, covered, for 20 minutes.
- Remove, dry the area, and cover up with warm comfortable clothing
Extract Toxins, Poisons, And Heal Wounds Using Plantain
Plantain poultices are quite powerful. You will find this unassuming herb growing in lawns, along trails, in driveways, or neglected parking lots. Plantain leaves with ¼ cup to ⅓ cup of water will create a paste.
Plantain has very prominent veins that start at the base of the leaf and go up to the tip of the leaf. It is an analgesic, has a numbing effect on skin tissue combined with extraction power.
A seemingly mild herb, it contains allantoin and can promote rapid regeneration of healthy skin on ulceration, or abrasion
Subdue Inflamed Insect Bites And Mild Itching
My grandmother’s favorite poultice was baking soda.
As a child, it was the first natural remedy I learned to make myself. It has multiple uses that extend far beyond cooking.
Baking soda has antimicrobial and antibacterial properties. It is an alkali, a soluble salt that interacts with acids.
Use the following steps as a remedy for bee stings and conditions that create mild itching.
1. Mix 3 tablespoons of baking soda with just enough water to make a paste.
2. Place the paste on the cloth.
3. Secure the cloth with a band and wait 20 minutes.
Plantain Poultice To Relieve Insect Bites And Itching
There are many herbs that can reduce the itch and swelling of insect bites, and plantain is yet another one thanks to its anti-inflammatory, anti-histamine, anti-bacterial and anti-fungal capabilities.
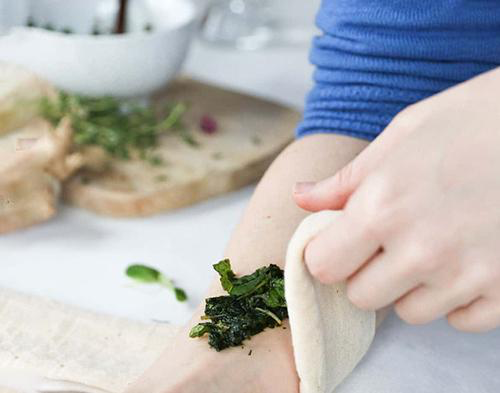
The quickest way to make a poultice is to chew up some leaves to make a paste, and then “spit” it onto the affected area (this works well when you’re outdoors, otherwise you can use a mortar and pestle). Then cover the paste with a bandage. This is known as a spit poultice.
No
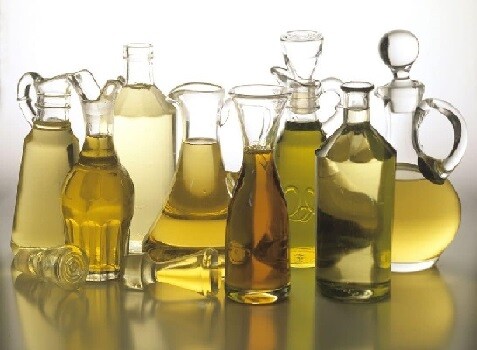
I think it depends on how you want to use it and for which area of your body. I like olive oil for pain salves and jojoba oil for my face creams.
Rating Scale
5 – Very Slow Absorption Rate
Feels heavy, leaving an oily protective barrier on the skin.
4 – Slow Absorption Rate
May feel sticky or waxy before warming at body temperature. Leaves a slight oily residue on the skin.
3 – Average Absorption Rate
Leaves a slight oily or satiny finish.
2 – Fast Absorption Rate
Feels light, absorbs into the skin readily, leaving a silky smooth finish.
1 – Very Fast Absorption Rate
Considered a “drying oil” quickly absorbed by the skin and does not leave an oily feel.
Abyssinian – 1
Almond, Sweet Organic – 3
Aloe Vera (Macerated) – 3
Andiroba – 2
Apricot Kernel – 2
Argan (Virgin) – 3
Avocado (Extra Virgin) – 4
Babassu – 3
Baobab – 1
Black Cumin Seed – 3
Black Current Seed – 3
Borage Seed – 5
Broccoli Seed – 3
Camellia Seed – 2
Canola – 2
Carrot (Macerated) – 4
Castor – 5
Cherry Kernel – 3
Chia Seed – 3
Chili Seed – 3
Coconut – 4
Cotton Seed – 4
Evening Primrose – 5
Flax Seed – 5
Grapeseed – 2
Hazelnut – 1
Hemp Seed – 3
Jojoba – 3
Macadamia – 5
Marula – 2
Meadowfoam – 2
Moringa – 2
Neem – 5
Oat – 4
Olive – 3
Palm – 5
Passionfruit – 2
Peach – 3
Perilla Seed – 2
Pomegranate – 3
Pracaxi Seed – 3
Prickly Pear – 2
Pumpkin Seed – 3
Raspberry Seed – 3
Ricebran – 3
Rose Hip – 1
Sacha Inchi – 1
Safflower – 2
Sea Buckthorn – 3
Sesame – 3
Soya Bean – 3
Sunflower – 3
Sunflower (Organic) – 2
Tamanu – 3
Walnut – 3
Wheat Germ – 3
I hope that this helps you decide which carrier oil to make the best products for you and your family.
Love ya,
Deb
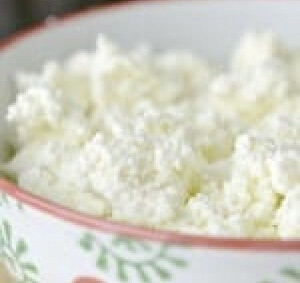
Easy Homemade Ricotta Cheese
Learn how to make ricotta cheese at home in just 5 minutes and never buy it from the store again!
Ingredients
- 2 cups Whole Milk
- 2 Tablespoons Vinegar lemon juice will work
- pinch of salt
Instructions
- Start by prepping your draining bowl. Stretch some unbleached cheesecloth over the edge of a bowl and secure it with a rubber band.
- Place your milk and the pinch of salt in a saucepan on the stove top. Turn the burner on a low-medium heat and place a candy thermometer in the pan. Stir occasionally until the temp reaches 165ºF.
- Once the milk reaches 165ºF, turn off the heat and add the vinegar. Give it one little stir, just enough to move around the vinegar and let the whole mixture sit for a minute or two.
- Pour the mixture into your prepared bowl slowly and gently.
- Let the cheese set on the counter for about 20 to 30 minutes to drain.
- Once the homemade Ricotta Cheese has drained you can place it in the fridge in an airtight container until ready to use or you can use it right away!
Recipe Notes
This recipe makes about 1/2 cup of homemade ricotta cheese per 2 cups of milk used and will store for a few days in the fridge, but make sure to use it up within a week. Extra homemade Ricotta Cheese can be frozen for later use
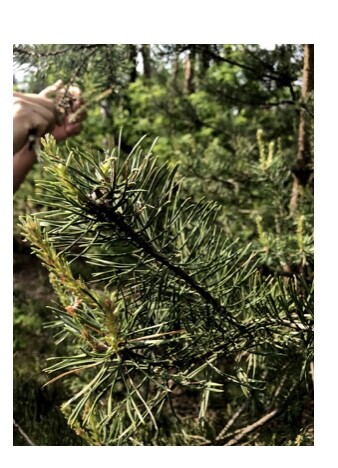
Pine Tips Syrup for coughs
If it’s May, y’all know I’m starting my syrup from pine tips, or you can use spruce tips. Pine Tips Syrup helps to heal cough and boost your immune system in the fall.
INGREDIENTS
- jar pine tips – only this year’s young tips, the youngest and the greenest
- 1 1/2 cup sugar
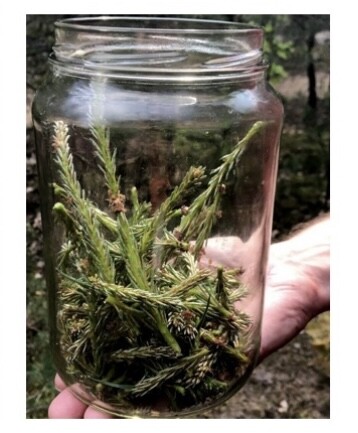
Remember to only collect tips away from roads. Be kind to the trees you use – do not take all the tips from one twig, you want to allow the tree to keep growing. I also found few green cones and threw them in too.
Clean tips by laying them out on a white cloth for a few hours, allowing any insects to remove themselves. Do not wash or rinse them with water, you don’t want to wash away the pollen.
You can cut tips and cones into smaller pieces. Place a layer of greens and cover it with sugar, add more greens and cover with more sugar. Repeat layers until your jar is full or you run out of tips. Tighten the lid down.
Place a jar in the window and let the sun work for 4 weeks. Give your jar a shake every couple of days. You’ll want to open the jar every 1-2 days, to let the gases out. I call it burping the jar.
After 4 weeks your syrup should be ready. Strain it through a kitchen cloth to get a clear syrup and pour it to jars. It can be stored till next Spring in the fridge or cold basement/pantry.
How to use it:
- take a spoonful of syrup a few times a day when you got cough
- add a spoon of syrup to your tea
- you can have it with your pancakes or oatmeal


